How to Install Windhawk on Windows 11: 2 Methods + Your First Mods
Installing Windhawk takes about 2 minutes, and there are 2 ways to do it: download the installer from windhawk.net and click through it, or run 1 winget command in Terminal. Either way you end up with the same Windhawk window with 0 mods in it, and nothing about Windows changes until you install your first one. I’ll go through how to install Windhawk with both methods, then get your first mods running, and cover updating and what an uninstall leaves behind after that.
Everything here is off my ROG Zephyrus G16 (Ryzen AI 9 HX 370) running Windows 11 25H2 and Windhawk 1.7.3.
If you landed here without really knowing what Windhawk is, it’s a free, open-source app that installs small mods to change how Windows looks and behaves, including the taskbar, Start menu and File Explorer that the Settings app won’t let you touch. Honestly, Windows 11 customization is so lackluster that every single person’s laptop ends up looking the same, so think of this as the starting guide I wish I’d had.
What You Need Before You Install Windhawk
- Windows 10 or 11. I’m on 11, and the steps are the same on 10.
- Admin rights. The installer brings up the admin (UAC) prompt and you have to approve it.
- An internet connection. Mods get downloaded from Windhawk’s online repository.
- Some free disk space. The developer puts a fresh 1.x install at around 820 MB, which I get into under method 1.
How to Install Windhawk: 2 Methods
Now there are 2 answers to how to install Windhawk, and both of them install the exact same app. Pick whichever one matches how you normally install things.
| Method | What you do | How you update | Best for |
|---|---|---|---|
| Installer | Download it, click through the setup | Run the newest installer over it | Most users |
| winget | Run 1 command | winget upgrade |
Existing winget users |
Method 1: The installer from windhawk.net
- Go to windhawk.net and download the installer.
- Run the file you downloaded and approve the admin (UAC) prompt.
- Choose your language.
- When it asks which type of installation you want, pick the standard one. The portable option is for a specific use case that I cover further down.
- On Choose Components, Windhawk is required and already checked. Start Menu Shortcuts and Desktop Shortcut are optional, so uncheck the desktop one if you don’t want the icon, then click Next.
- Click Install and wait for it to finish.
- Click Finish, and Windhawk opens on its own.
The Choose Components screen on mine listed Space required: 52.2 MB, but don’t go by that number when you’re checking disk space. The developer’s Windhawk 2.0 alpha 1 release notes put a fresh 1.x install at around 820 MB, because 1.x comes with the development tools it uses to compile mods on your machine. In 2.0 those tools become optional and the same notes list a fresh install at around 40 MB.
One thing that surprised me: if you’ve had Windhawk on this PC before and uninstalled it the default way, your old mods come back as soon as the new install opens. When I tested it, all 11 of mine were back and already enabled, because the default uninstall leaves them on your drive. I go through exactly what stays behind in my uninstall Windhawk guide.
Method 2: How to install Windhawk with winget
If you already use winget, Microsoft’s command-line package manager, you can skip the browser entirely. Open Terminal and run this:
winget install -e --id RamenSoftware.WindhawkThe -e flag makes winget match the ID exactly so it can’t grab a similarly named package, and --id limits the search to package IDs. Microsoft documents both in its winget install reference. If an admin prompt comes up, approve it. For those of you who’ve never touched winget, method 1 gets you the same app.
Standard vs Portable: Which Install Type to Pick
So on a fresh install, Windhawk’s installer asks whether you want a normal install or a portable copy extracted to a folder. Standard is the right pick for almost all of you guys, and portable only makes sense if you already know why you want it.
Both versions run the exact same mods the exact same way. The difference comes down to 2 things, which are where your mods and settings get stored, and whether Windhawk starts on its own when you sign in.
Standard installs the program into C:\Program Files\Windhawk and sets itself up to start with Windows, so your mods load in the background every boot and you never have to think about it. On my G16 the mod files sit in C:\ProgramData\Windhawk, and the mod list and settings sit in the registry under HKLM\SOFTWARE\Windhawk. Standard is the one I run.
Portable extracts everything, mods and their settings included, into a single folder you choose. You can copy that folder to another PC, or even keep it on a cloud drive so the same setup follows you between machines, which a few people in the Windhawk GitHub discussions do.
Portable doesn’t start with Windows
The catch with portable is that it doesn’t register itself to launch at sign-in, so you reboot, your taskbar is back to stock, and it looks like your mods broke when really Windhawk just never started.
If you still want portable, the fix is a startup shortcut, which Windhawk’s developer confirmed in that same discussion:
- Open your portable Windhawk folder, right-click windhawk.exe and choose Show more options > Create shortcut
- Right-click the new shortcut and open Properties
- In the Target field, add
-tray-onlyafter the closing quote so it reads"C:\YourFolder\windhawk.exe" -tray-only, then click OK - Press Win + R, type
shell:startupand press Enter - Move the shortcut into that Startup folder, then reboot to test it
The -tray-only switch starts Windhawk minimized to the system tray, so the window doesn’t pop up every time you sign in. Keep it outside the quotes, since the developer had to correct someone in that thread who put it inside them. The Startup folder is Windows’ own way of launching programs at sign-in, and Microsoft covers it in its startup apps documentation.
Even with the shortcut, people in that discussion report that Windows comes up with the stock taskbar first and the portable copy takes a bit before the mods load in.
Which one to pick
| Standard | Portable | |
|---|---|---|
| Starts with Windows | Yes, automatically | No, needs a manual shortcut |
| Where mods live | C:\ProgramData\Windhawk plus the registry | The portable folder you chose |
| Move your setup to another PC | Export a registry key and copy a folder | Copy the folder |
| Best for | Almost everyone | Multi-PC setups, testing |
Moving a standard install is more steps than portable, but it does work. I got all 11 of my mods back with their settings on a clean install by importing a registry export of HKLM\SOFTWARE\Windhawk and copying my saved C:\ProgramData\Windhawk folder back in, and I cover that backup in my uninstall Windhawk guide.
First Launch: What You See After the Install
Once Windhawk opens, you land on the Home tab. On a clean install it says No mods are installed with a Browse for Mods button under it. Nothing is running yet at this point, and Windhawk doesn’t change a single thing about your system until you install your first mod, which is worth knowing before you start hunting around for what it did.
The tabs along the top-right of the window:

- Home — your Installed Mods list, where you toggle, configure, or remove what you’ve added
- Explore — browse and install mods from the marketplace
- Settings — language, updates, and the advanced options
- About — your Windhawk version number
How to Install Windhawk Mods
Now Windhawk on its own does nothing, so the mods are the whole reason to have it, and it’s where I see most people stall out right after a clean install. Once you know how to install Windhawk mods and where their settings are, each one takes about a minute.
Installing your first mod
From the Explore tab, click into whichever mod looks interesting and hit Install. Windhawk compiles the mod on your machine, which takes a few seconds, and then it applies live with no reboot and no signing out. If it’s a taskbar or File Explorer mod, your taskbar might disappear for a second while the mod loads in, which honestly stumped me the first time I saw it, and it comes back on its own.
Where the mod settings hide
Every mod has its own Settings tab tucked inside it, and for most of you guys this is the part worth slowing down for. Plenty of mods come with a theme dropdown or a handful of toggles that completely change what the mod does, so take a look in there before you decide a mod isn’t for you. Change what you want, save it, and it applies right away.
Turning a mod off without losing your settings
Find the mod under Installed Mods on the Home tab and use the toggle rather than reaching for uninstall. Toggling stops the mod immediately but keeps everything you configured, which is exactly what you want when you’re trying to work out whether a mod is causing a problem. Uninstalling a mod wipes its settings along with it, so save that for when you’re actually done with it.
The one habit I’d build early is installing mods one at a time and actually using your machine for a minute before adding the next one. As for which ones are worth bothering with, I’ve got a full rundown of the best Windhawk mods I still keep enabled.
How to Update Windhawk (and Your Mods)
Now this one confuses people, because there are really 2 separate things to update: the Windhawk app itself, and each mod you’ve installed. Updating one doesn’t touch the other, so knowing how to update Windhawk properly means handling both.
Updating the Windhawk app
First, check which version you’re on. Click About in the top-right of the Windhawk window, next to Home, Explore and Settings, and the version number is right at the top. Mine shows Windhawk v1.7.3, which is the latest stable release as I write this.
If windhawk.net lists a newer version, how you update depends on how you installed it:
- Installer method: download the latest installer from windhawk.net and run it over your existing install. Your mods and settings carry over, so there’s no need to uninstall first.
- winget method: run the command below in Terminal
winget upgrade -e --id RamenSoftware.WindhawkMicrosoft documents the flags for this one in its winget upgrade reference.
Updating your Windhawk mods
On the current stable version (1.7.3, the one I’m running), mods don’t auto-update and there’s no update-all button. Auto-updating is still an open feature request on GitHub, so you’re not missing a setting somewhere. Instead, Windhawk flags each mod that has an update waiting, and you update them one at a time.
On the Home tab, look through your Installed Mods for a blue Update available tag in the top-right corner of a mod’s card. My File Explorer Styler had one sitting there when I went to write this.
Click Details on that card to open the mod’s page. The version bar at the top shows exactly what you’re jumping between, which for me was Installed version: 1.6 against Latest version: 1.7. Hit Update and it’s done in a few seconds, with your settings kept.
Right next to those 2 version labels there’s an Other versions tab that most people never notice, and it lets you install an older version of the mod. So if an update breaks something and the author hasn’t pushed a fix yet, you can roll back to the version that worked instead of turning the mod off entirely.
Honestly, I don’t mind the one-at-a-time thing. I read the changelog, update one mod, and use my PC for a minute before touching the next. If an update causes a problem, I know exactly which mod did it, and I can either roll it back through Other versions or toggle it off without losing my settings.
Updating a mod is also often the fix after a Windows update breaks your taskbar or Start menu, since mod authors push patches for new builds. If updating doesn’t sort it out, my Windhawk not working guide goes through the rest.
Windhawk 2.0 is in alpha right now, and its release notes list an option to update all your mods at once from the home screen. It’s still a pre-release though, so I’m staying on 1.7.3 until 2.0 hits stable.
What Is Windhawk, Exactly?
Windhawk works as a customization marketplace for Windows. You browse mods, click Install, and each one changes one specific part of Windows or a program, like a transparent taskbar or a Start menu without the Recommended section. So if you’ve been asking what is Windhawk because someone posted a desktop that barely looks like Windows 11, that’s usually what they were running.
It’s made by Ramen Software, which is really one developer, Michael Maltsev (side note: fellow Ramen enjoyer found lol). There’s no paid tier, and the whole thing is open source on GitHub if you want to look under the hood.
As for how it works, Windhawk sits in the background and loads each mod into the program that mod is meant to change. It doesn’t edit or replace Windows’ own files on your disk. It injects the mod’s code into the program while it’s running, so when you toggle a mod off or exit Windhawk, the mod unloads. Each mod is a small chunk of C++ code with its source public in the windhawk-mods repository, and that same injection is why your antivirus might throw a fit about it.
On my G16 I’ve used it to restyle the taskbar with Windows 11 Taskbar Styler, clean up the Start menu with Start Menu Styler, and I went as far as making Windows 11 look like macOS using nothing but Windhawk mods. It isn’t only looks though, since plenty of mods change behavior instead, like Click on empty taskbar space, which lets you assign an action to clicking a blank part of the taskbar.
What is windhawk.exe?
If you spotted windhawk.exe in Task Manager and that’s how you ended up here, that’s Windhawk’s main program. It runs in the background from your system tray and handles loading mods into other programs, so it’s completely normal to see it running with the Windhawk window closed.
The one check I’d do is right-clicking it in Task Manager and picking Open file location. A normal install lives in C:\Program Files\Windhawk. If it’s sitting somewhere random like your Downloads or Temp folder and you don’t remember installing Windhawk, treat that as a red flag and scan it. Also, don’t read too much into the tiny memory number next to it. Task Manager showed Windhawk at 4.9 MB on mine with 11 mods on, and the extra RAM actually lands in Explorer, which I measured in my Windhawk performance test.
A Quick Word on Safety
Windhawk is safe to run, and the reason is that injection I just described. Windhawk loads its code into programs that are already running rather than patching Windows on your disk, which is great for backing out of it but also happens to be what a lot of real malware does. So your antivirus might throw a fit about it.
The rule I stick to is to download from windhawk.net or winget and nowhere else. A random “Windhawk_Setup_v2_FREE.exe” from some download aggregator is a much bigger risk. The mods are also a separate trust question from the app itself, since those are community-submitted.
I go through all of it properly, including the antivirus side and the anti-cheat problem, in my full breakdown of whether Windhawk is safe.
What to Do if a Windhawk Mod Breaks Something
If your taskbar goes blank or a program starts crashing right after a change, treat it as a compatibility issue first rather than jumping straight to assuming malware.
- Open Windhawk and go to the Installed Mods list on the Home tab
- Disable the most recently enabled or updated mod (toggle it off, don’t uninstall, so you keep your settings)
- If Explorer is still broken, restart it through Task Manager, or just sign out and back in
If one specific program keeps crashing and you’d rather not give up Windhawk entirely, there’s a process exclusion list in the advanced settings that tells Windhawk to leave that program alone. I walk through the exclusion list properly, along with the other usual suspects like Windows updates and mod conflicts, in my Windhawk not working guide. The one thing I’d warn against regardless is “fixing” an antivirus conflict by switching off real-time protection or excluding your entire drive, because you only ever need to exclude the specific Windhawk process.
Removing Windhawk Later (and What It Leaves Behind)
Go to Settings > Apps > Installed apps, find Windhawk, click the ⋯ menu next to it and choose Uninstall. If you installed with winget, you can run this instead:
winget uninstall -e --id RamenSoftware.WindhawkMy desktop went back to stock Windows 11 after a restart, but the default uninstall isn’t a full removal. The uninstaller has a Remove the program’s settings checkbox that’s unchecked by default, and when I left it that way, 67.5 MB stayed in C:\ProgramData\Windhawk along with all 11 of my mods in the registry. It’s handy if you plan to reinstall, since everything came back enabled, and annoying if you wanted Windhawk fully gone.
What the checkbox removes, and the leftovers that are still there even after checking it, are in my uninstall Windhawk guide.
Windhawk FAQ
Is Windhawk free?
Yes, completely. It’s open source and supported by optional donations, with no paid tier, subscription, or premium mod pack.
Does Windhawk work on Windows 10?
Yes, and how to install Windhawk on Windows 10 is the same as on 11, using either method here. The mods are what differ, since each one lists its own supported builds, and a mod written for the Windows 11 taskbar won’t do anything on Windows 10. Check the mod’s description before installing it.
How do I make Windhawk run on startup?
A standard install already does. When you exit Windhawk from the tray, the exit dialog on mine says it’ll start automatically on the next system startup unless you check Don’t start automatically on the next system startup. The portable version is the one that needs the startup shortcut from the portable section. If yours is a standard install and still isn’t starting with Windows, that’s in my Windhawk not working guide.
What is Fork in Windhawk?
Fork is the button on a mod’s page that makes your own local copy of that mod so you can edit its code. A forked mod is its own separate copy, so it won’t pick up updates from the original. For most of you guys, you’ll never need it, since the mod’s Settings tab covers basically everything.
Does Windhawk slow down your PC?
Not in anything I could measure. I ran the Cyberpunk 2077 benchmark 4 times, alternating between Windhawk’s 11 mods on and off, and the averages landed 0.33 FPS apart (153.59 off against 153.26 on), which is smaller than the gap between 2 runs on the same setting. The full numbers are in my does Windhawk affect performance test.
Do I need to remove ExplorerPatcher or StartAllBack first?
Not strictly, but I’d lean toward it while you’re finding your footing. Both of those tools reshape the same parts of the shell that most Windhawk taskbar mods target, so running everything at once is the quickest way to end up with a broken taskbar and no clue which tool actually caused it. Get Windhawk working on its own first, then decide whether you still need the other one hanging around.
Do I need to close Windhawk before playing games?
If it’s anything running kernel-level anti-cheat, yeah, I’d close it first and reopen once you’re done. Anti-cheat is built to spot code injection and it isn’t going to care that yours is a taskbar mod. For what it’s worth, I’ve played Valorant with Windhawk running the whole time and nothing came of it, but that’s one account, and Vanguard can change what it flags with any patch. I cover the whole thing, including which games actually matter here, in my Windhawk safety guide.
What to Mod First
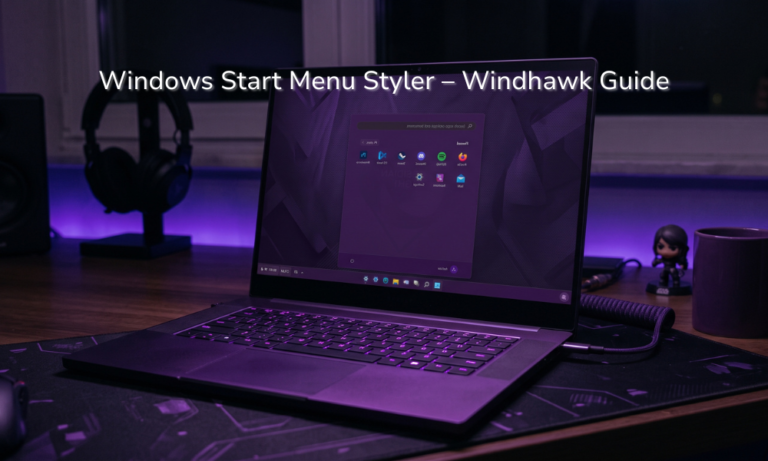
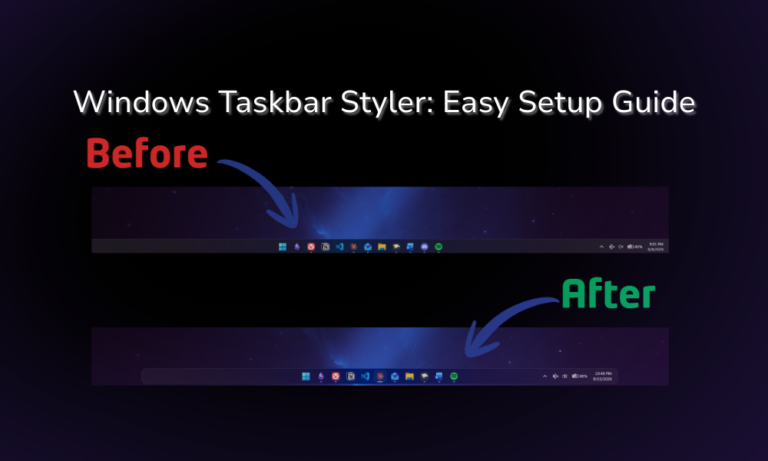
Now that you know how to install Windhawk, the next thing is picking what to put in it. I put together a rundown of the best Windhawk mods I still keep enabled, along with the ones I ended up turning off and why. If it’s the taskbar you’re after specifically, my Windows 11 Taskbar Styler guide goes deep on that one mod, and there are matching walkthroughs for the Start Menu Styler and the File Explorer Styler if you’d rather start somewhere else.
If you’re on an ASUS laptop and you’re in a debloating mood anyway, my G-Helper download and setup guide rips out Armoury Crate the same way, and my best G-Helper settings guide covers the 3 profiles I run day to day.
And if a mod installed fine but isn’t changing anything, drop your Windows build (Settings > System > About) and the mod name in the comments and I’ll take a look.