Undervolt with G-Helper: 4 Safe Steps for a Cooler Laptop
Here is a step-by-step guide to undervolting with G-helper. Undervolting is the act of giving your CPU less energy than it’s programmed to get. If you’re wondering how to get the most out of your laptop’s battery life, undervolting is definitely something to consider. You might be asking – Wouldn’t giving the CPU less power make your computer slower? No, it won’t (If you do it right). In this guide, I’ll go through what an undervolt is and how you can safely implement it on your rig.
What does Undervolting actually do?
Before we learn what undervolting actually is, we need to understand a specific concept about CPU wattage. Whenever a new CPU is made, it’s automatically programmed to receive extra wattage by its manufacturer. This is more of a safety mechanism, but in reality, most chips can perform well under their preset amount. Undervolting is purposefully lowering your CPU’s wattage in order to save some energy without losing essentially any performance at all.
Is Undervolting Safe?
Before we get into the meat, please understand that software-based undervolting (specifically with G-Helper in this case) can not cause any permanent damage to your components. If you do go full throttle and end up pushing it too much, the worst that can happen is a crash or freezing of your computer. The g-helper undervolt setting is native to the app, so turning off the app will return performance to normal.
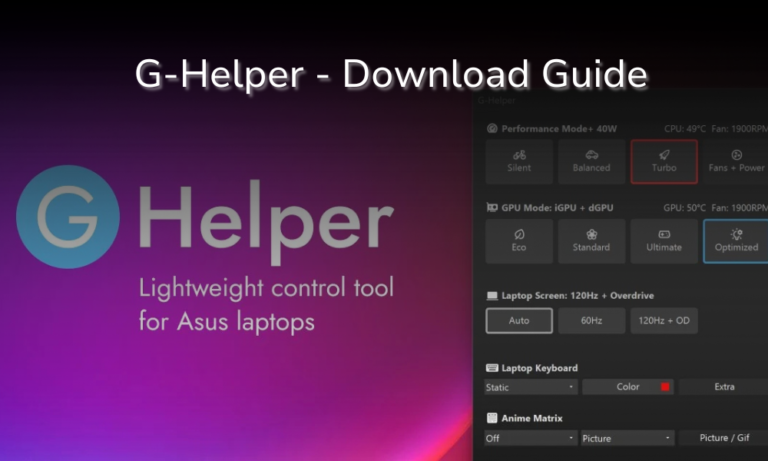
Step 1: Open the Fans + Power panel
In this guide, we’re going to be using G-Helper, a free app used to edit laptops and tweak specs with ease. If you don’t have G-helper installed, you can check out my G-helper installation guide.
To get started, open up G-Helper from your sidebar and go over to the Fans + Power section. This menu contains the main section for more advanced controls; therefore, it is where we will be spending most of our time.
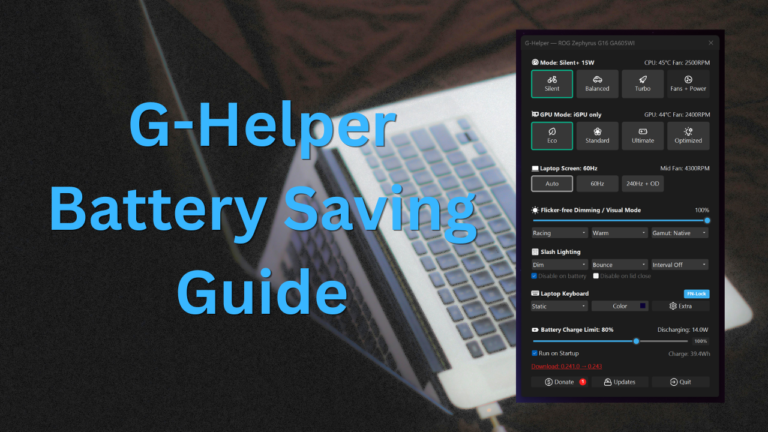
Step 2: Start Safe
In this menu, click the advanced section and make sure you have the extra part of G-Helper downloaded. Once you see something similar to the image below, you know you’re in the right section.
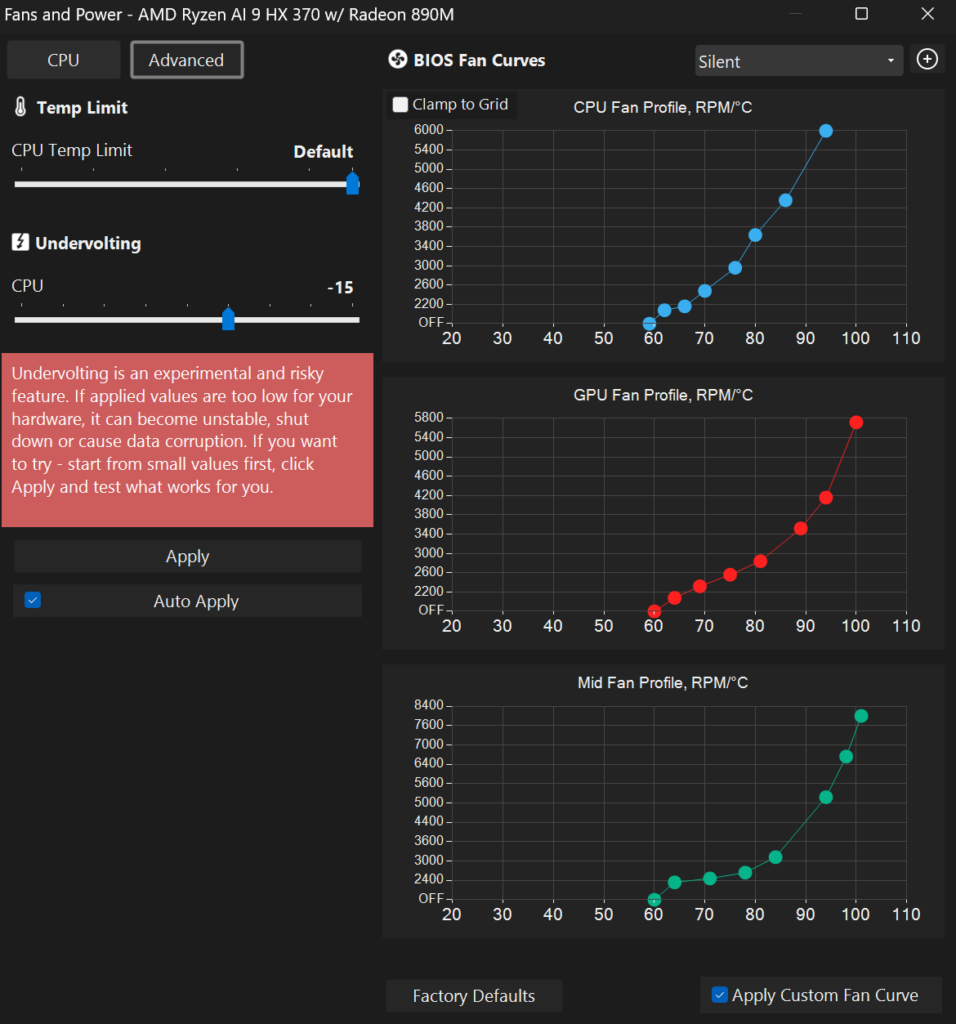
As seen on the left of the image, the main section will be a simple slider, which you can choose to your liking – but be careful not to go too far. As seen in the image, I have my ASUS Zephyrus (2024) set to -15W of Undervolting, which is a pretty safe amount. From personal testing, some CPU’s can see glitches anywhere farther than -20 Watts. I’d recommend starting within that range.
Step 3: Stress test for stability
Now that your laptop is undervolted, I recommend testing it right away, as each CPU can perform slightly differently depending on the amount of undervolt. For this, we’re going to use a tester called Cinebench, which is a free app that allows you to push and test your CPU at 100% performance. Go ahead and download Cinebench (Cinebench 2024) on your laptop, then come back here. Quick tip before you test – Make sure your charger is plugged in, with the highest power settings, so the CPU voltage won’t be limited.
Once it’s downloaded, choose the Multi-Core test while making sure your undervolt is active. The test will take around 10 minutes, but make sure to pay attention to any crashing or glitches, which would indicate your undervolt it too much. If it passes without any of these, then congrats! Your CPU is now more power-efficient. If you feel like getting the most out of it, you can push the undervolt a bit higher and test again, but discretion is advised.
My personal results from the stress test
G-Helper undervolt data I got from my ASUS G16 Zephyrus with a Ryzen AI 9 HX 370
- No undervolt: 1158 Points, 95C CPU
- -20W : 1208 Points, 95C CPU – +4.3%
- -25W : 1256 Points, 95C CPU – +8.5%
- -30W : 1241 points, 95C CPU – +7.2%
What do these results mean?
It seems that at max CPU usage, undervolting it will actually increase its performance, as it lowers the rate of thermal throttling occurring (This is when the CPU reduces clock speed due to overheating). This means my CPU was able to perform better with less energy, since the extra wattage that was given to it was simply overheating it while not adding to performance.
Step 4: Find the sweet spot
As seen in my test, undervolting allowed for an increase in CPU performance, giving stronger performance at max temps. Since my CPU performed the best at -25W (8.5% improvement in performance), I will be using that instead of my previous safe amount of -15W. If you also wish to find the sweet spot for yourself, take some time to run Cinebench at these varied undervolt values, selecting the one that performs the best for you! Remember, each CPU can be different, so don’t just copy mine. Look out for any crashes or glitches, as that would mean you’re pushing it slightly too far.
Undervolting is a wonderful free tool that any supported laptop user can take advantage of to limit the wastage of battery life or even reduce the thermal throttling at max temps. Take the time to find your chip’s limit, and post any results in the comments! Would love to see what specs worked out for you guys. If you’re looking to increase your battery life in other ways, check out my Guide to G-helper fan curves (You’ll be surprised how much energy they waste).